Drilled and tapped the nozzle this morning. I don't think that I mentioned it earlier but the steel is 12L14 steel, commonly refered to as Ledloy because of addition of lead (0.15-0.35%). It's really nice stuff to work with. Here are a couple of pictures.
Showing posts with label machining. Show all posts
Friday, January 16, 2015
Thursday, January 15, 2015
I-Class Motor update
I actually finished the motor casing prior to the nozzle, but here are the two pieces together. It was a conscience decision to complete the casing first so that I could get the most accurate measurement of the ID before starting on the nozzle. The ID in this case ended up being very close to the spec. and the nozzles actual OD ended up being 1.606". I will probably make the bulkhead a few "thou" smaller in diameter to make it a bit easier to install and uninstall in the motor.
Tuesday, January 13, 2015
New Motor design - nozzle
I tried to take a lot of pictures while making the nozzle for this latest motor and thought I would show the progression and talk about each of the steps a bit. I'm not a machinist and this isn't meant to be a tutorial, just a bit of insight into my thought process. Feel free to comment.
In this image I have the rough stock in the lathe. It's about 0.75" longer than the nozzle needs to be but I will cut it to length later when I turn it to work on the other side. I begin by facing the end, if nothing else I take this as an opportunity to ensue that the cutting tool is at the correct height.
After using a center bit to start drilling out the throat I progress through larger drill bits until I get close to the final dimension.
I then switch to a boring bar and cut the throat to the final dimension using several light cuts. Although the piece is pretty securely held by the chuck I use light cuts are to minimize any deflection of the piece.
Once the throat is to the final dimension, I use the tail stock live center to help keep the piece as rigid as possible and I begin taking the piece down to the correct diameter. I am working on the convergent side of the nozzle at this point.
Once to the final OD, I roughly mark the end of the "shoulder" where the retaining screws will eventually be added and cut the o-ring gland using a cut off or parting tool. This action demands that the piece be very rigid and often I find that this is an operation that is easier if done closer to the chuck. In this instance it was fine though.
Back to the boring bar and then we began working on cutting the convergent angle.
This is looking right down the length of the boring bar.
This a close-up showing the inlet to the throat area, it's currently a pretty sharp angle. Ultimately you want a smooth transition from the convergent angle to the throat rather than a sharp edge.
I will spend some time later sanding this area to get a smoother transition. One thing that I like to do is knock the edge off a bit with the boring bar. The convergent angle is 30, so I reset the tool to 15 and take just a bit off as seen in the above picture. The rest will be smoothed with sandpaper later.
The final step before flipping the piece around is to index the holes for the retaining screws. This particular lathe as an indexing locations on the main gear that allow me to do this. I use a Dremel and center drill to mark out the locations on the piece. I then removed it from the chuck and rough cut it to length before re-chucking it and working on the other side.
It's critical to take your time when re-chucking the piece to ensure that you get it centered correctly. Here I am facing it to the final length needed.
I took one quick cut with a0.625" bit to remove some excess material from within divergent side.
Then I brought the live center back in and roughed out the excess material from the outside of the divergent cone.
Here I have it cut to the max diameter of the divergent section.
I like to mark out some rough locations so I know what I'm working towards.
I then set the tool to 10 degrees and begin removing the rest of the material from the outside of the divergent cone. Sometimes cutting towards the right...
and sometimes cutting towards the left.
All of the excess material around the divergent cone is now removed.
I then add the steady rest for rigidity and bore out the divergent cone.
The finish looks a bit rough in this image but it actually cleans up nicely with a bit of sand paper and time. I do most of that finish detail on my smaller lathe as it's variable speed control makes it a bit easier.
The last step is to remove some excess material from the shoulder area. This is tricky on a piece this small but with a little patience and the right tool it isn't too bad.
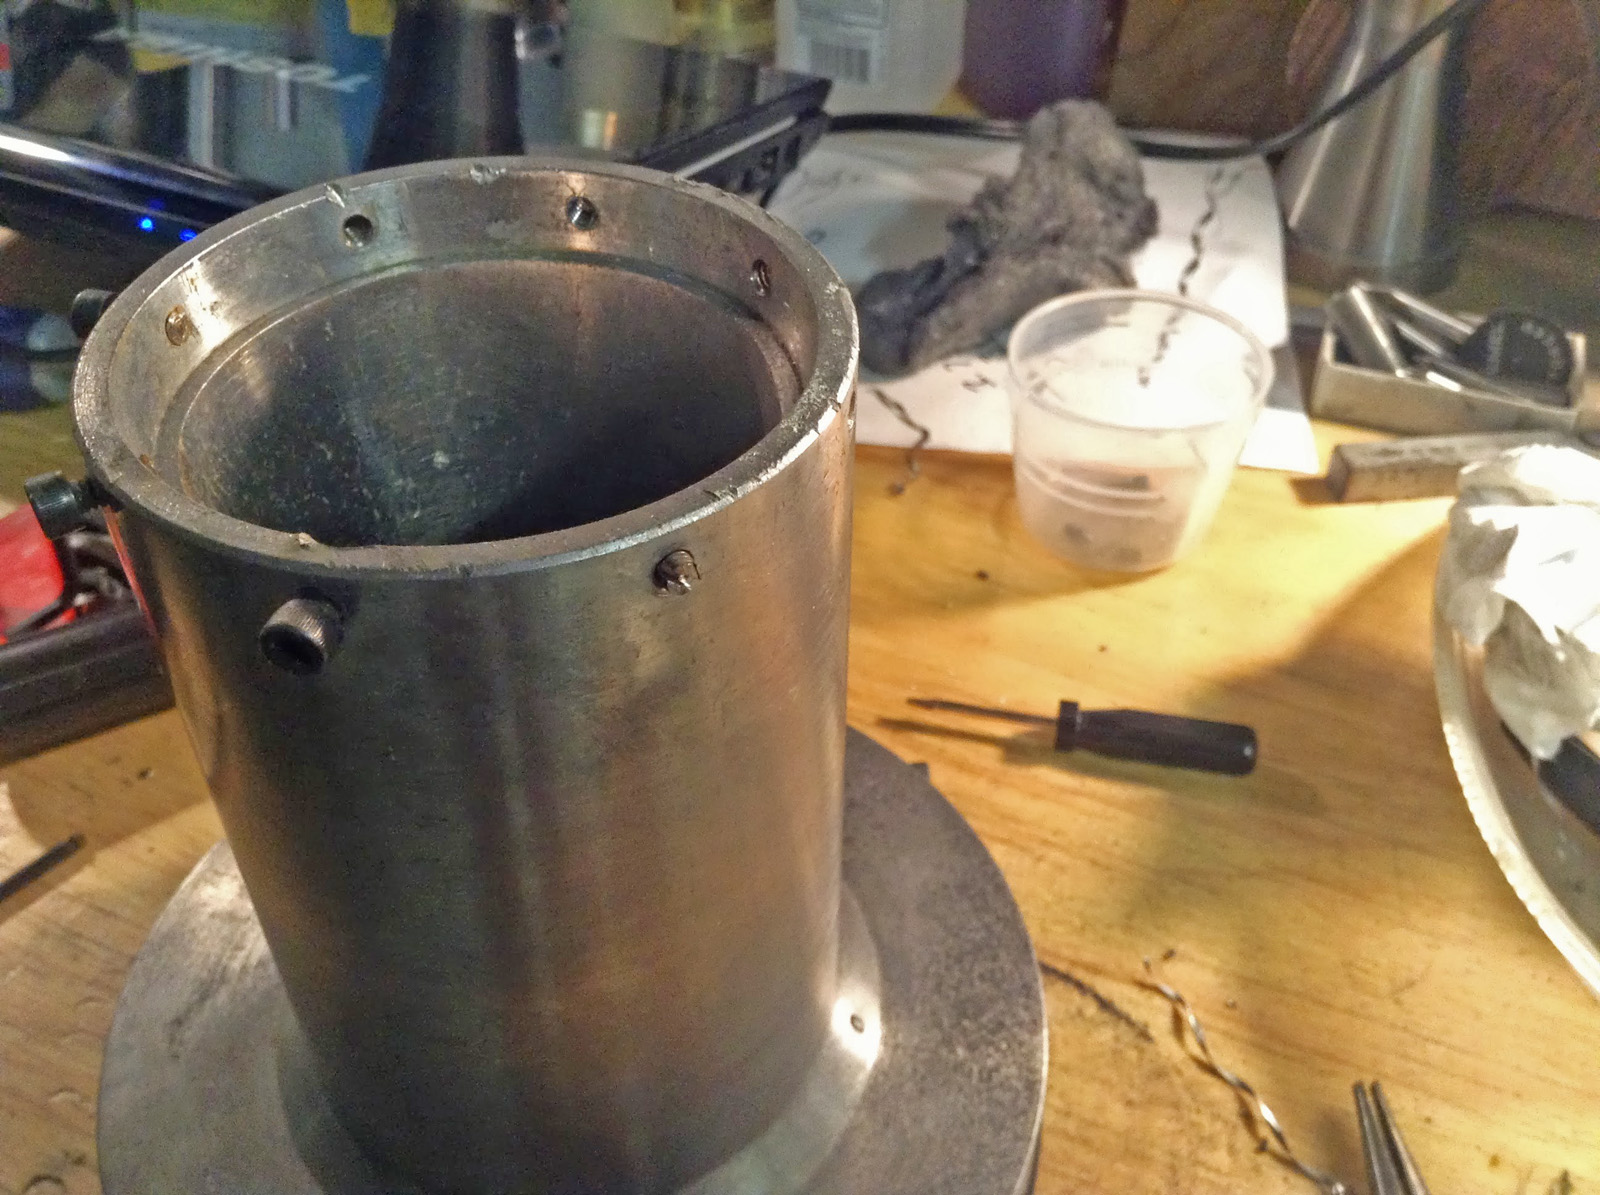
Nearly completed nozzle. All that remains is to drill and tap the four screw holes and sand/polish the inside smooth.
Monday, September 8, 2014
TR-1 Motor Update
This past weekend I finished a few more tasks, although it's starting to look like I may not be quite ready to test fire the motor by the 20th of this month like I was hoping to do. I was hoping to get o-rings by Saturday so I could do a final test fit of the nozzle and bulkhead but I didn't get them on Saturday like I had hoped, but I can do that this week as it shouldn't take long. I did some minor machining on the nozzle to get the two pieces to mate together perfectly. I also took the time to go back and adjust the inlet a bit by machining the inlet at decreasing inlet angles (30, 15, and 7.5 degrees) and then grinding and polishing smooth so the inlet is MUCH smoother and gradual transition to the throat. No change to the throat diameter was made.
I also made two casting bases out of scrap redwood that I had lying around. The casting tubes are held in place securely with a friction fit. In the past I have only used a 1/4" recess but these are a full 1/2" deep so the tubes seem pretty snug. The surfaces of the wood that comes into contact with the tubes/propellant were coated with epoxy. Once cured, they were machined to the final dimensions. This seals the surface from the grease used as a release agent and helps maintain dimensional stability.
Tuesday, September 2, 2014
TR-1 Motor update
We finished the bulkhead and nozzle. The nozzle has been done for a while but still needed the holes for the retaining screws drilled and tapped.
We also ordered some casting tubes from Uline. Four inch ID tubes with a wall thickness of 0.080". I also intended to order some sorbitol and looked around online for the brand that I use to use, Now Foods, but I was surprised that it appears to have been discontinued. I'm sure there are other sources but am hesitant to try a new brand but I've noticed a significant difference in casting with other brands. After giving it some thought I decided to switch to Dextrose. It's a bit of a change but propellant produced with Dextrose versus Sorbitol has a slightly higher burn rate which is good for a boosted dart. It's also about half the cost which doesn't hurt. I don't need to change the motor design as it was a bit conservative to begin with. The dextrose will result in a slightly higher chamber pressure but still well within safe limits. I bought the dextrose from Lucky Vitamin. It's the monohydrate form of dextrose so 9% of its mass is water. This isn't an issue as most, if not all, can be driven off during casting. It is important to account for this when weighing out to assure the correct ratio.
Friday, August 29, 2014
TR-1 Rocket Motor Casing
Completed Motor Casing:
With the casing now completed I will focus on completeing the bulkhead and with that I will have all of the motor componets. Then I'll turn my attention to making some simple casting tools for the 4" diamter grain segments. I'm also gathering a list of supplies that I'm hoping to order soon including screws, o-rings, Sorbitol, casting tubes, and a few other misc. bits.
Monday, August 25, 2014
TR-1 Rocket Motor Update
Started work on the after what has turned out to be far too long of a layoff...work and such getting in the way. We got the motor casing cut to length, ends trued, and screw locations drilled. Theo and I are hoping to fire this motor mid September and fly before the end of the year. Pending a successful static firing the plan is to use this motor as a booster for a boosted dart configuration. More on that later...
Monday, June 17, 2013
SUGAR SHOT'S P-CLASS MOTOR NOZZLE UPDATE
I finished the modifications to the Sugar Shot to Space's DSS TM-3 motor this weekend. It was particularly tough machining through screw holes. The open spaces created a hammering effect that subjected the tool and lathe to quite a beating. I wonder if filling the holes with epoxy would have helped. Once the adapter ring arrives I will make sure the two pieces fit together and that they fit the motor casing. For now, I'm back to work on the TR-1 motor.
Thursday, June 13, 2013
SUGAR SHOT'S P-CLASS MOTOR NOZZLE UPDATE
I'm making good progress on the nozzle, but it's slow going. I'm about halfway through the biggest modification which is cutting a relief that the adapter ring will fit into. The area that I'm cutting away has the screw holes in it and cutting through that section really hammers the tool. The other mods should be simple by comparison.
Wednesday, June 12, 2013
SUGAR SHOTS TM-3 NOZZLE
Sunday, June 9, 2013
TR-1 MOTOR UPDATE (NOZZLE)
I made good progress on the TR-1 nozzle this weekend. The two pieces fit together nicely. I'm still tempted to take some weight out of the nozzle, I think I could get a nearly half a pound of weight out of it. I'll probably hold off until after the initial static test before trying to reduce the nozzle mass. I'm currently making some modifications to the DSS motor nozzle for the Sugar Shot to Space project. Once that's completed, I'll finish the TR- 1 nozzle and get to work on the rest of the motor.
Monday, June 3, 2013
TR-1 UPDATED NOZZLE DRAWING
TM-3 AND TR-1 MOTOR WEEKEND UPDATE
I finished the motor casing for the P-class SStS TM-3 motor this weekend. Not surprisingly, the 6061 t-6 aluminum tube was much easier to work with than the steel pipe used for the previous DSS test motors. I'm pleased with the casing and can't wait to see the completed motor.
I also managed to get a good start on the divergence half of my N-class TR-1 motor. The 12L14 leaded steel I'm using for this piece is noticeably easier to work than the regular 1018 steel used for the other half of this nozzle. Using some good quality silver and deming bits I was able to remove a lot of material quickly. Well relatively quickly any way. I want to get this piece finished this week so I can get the two halves of this nozzle together.
Labels:
machining,
n-class,
P-class,
SStS,
TR-1 Rocket
Wednesday, May 29, 2013
SStS TM-3 MOTOR CASING
I started on the TM-3 motor tube this morning. It absolutely dwarfs my lathe, but being aluminum instead of steel it's much easier to work with than the previous DSS motor cases that I've worked on. I only need to index the retaining screw locations and true the ends. I should be able to finish this tonight, then I'll get to work on the other half of the TR-1 nozzle. With approximately 90 lbs of propellant this motor should produce a total impulse that fits it into a P-Class designation.
Sunday, May 26, 2013
TR-1 ROCKET UPDATE
I finished all of the lathe operations for the nozzle ring. When I took it off the lathe I was struck by how heavy it was. It doesn't really matter for a static test, but I decided to go back in and remove a bit of the excess material. The amount of material that was removed (drawing above) reduced the parts weight by nearly 30%. It will also make it easier to drill and tap the twelve screw hole locations as they are no longer blind holes. There are still a few areas I can pare down but I'll hold off for now.
I'm going to take a quick break from the TR-1 motor and work on the SStS TM-3 motor casing which seems to be coming together quite quickly. This is a pretty large O or P-class motor which is about as big a "Sugar" motor as I've ever heard of. It shouldn't take me long to finish work on the casing and then I'll get back to work on the TR-1 motor.
Labels:
casting,
DSS TM-3,
machining,
SStS,
TR-1 Rocket
Subscribe to:
Posts (Atom)